CHOPPER CHAT
 In order to couple two 20s in a semi-fixed formation, I’ve fitted this pair with Kadees on the nose ends only. The green loco is a dummy (unpowered), salvaged from a knackered MR limited edition ‘Tinsley Twins’ set, thus solving any double-heading issues on a non-DCC layout.
Over the past few weekends, I made it my mission to try and streamline my PC’s hard drive, sifting through literally thousands of digital images of models either in a finished or ‘in progress’ state. Since starting my job at Model Rail, I’ve made a point of photographing virtually everything that I do in the hope that the step-by-step photographs will prove useful in future demonstration articles or Q&As.
This has, indeed, proved a good strategy, especially after starting this blog, doing the odd book and helping out kit, glue and paint manufacturers with images for their instructions or catalogues. But, the downside is that I’ve been struggling to accommodate them on my laptop. Even worse, those files that have been moved onto CDs or USB drives have been ‘filed’ away safely to the point where I’d completely forgotten about them.
However, the archivist within me has been straining to get out recently, so I’ve begun to try and organise these files more logically, printing off contact sheets for each CD for easy reference – this all might sound obsessive, but it’s already thrown up loads of projects that had slipped my memory.
Anyway, enough of the waffle: Amongst the flotsam and jetsam on my hard drive were a vast number of ‘spares’ from my loco detailing books, most of which were jettisoned in favour of a more varied content rather than a chapter dealing with a single loco project. Presented here is a selection of pix showing the detailing of a Bachmann Class 20, or ‘Chopper’ as we used to call them (they sounded like helicopters).

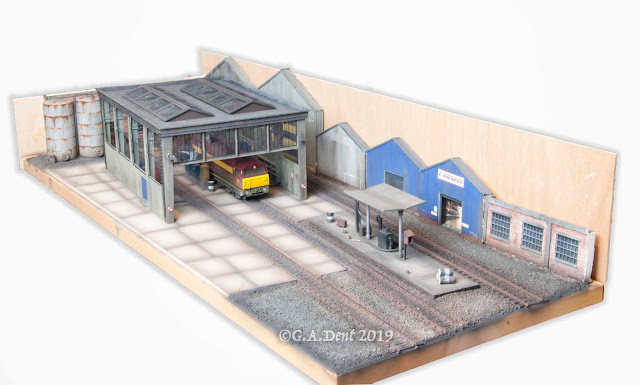
I’ve been quietly assembling an impressive fleet of these Type1s in a variety of period guises, from D8000 in as-built condition, to a handful of DRS-owned Class 20/3s. In the middle is a pair of late 1970s machines, one in blue and the other in a later version of BR green with full yellow ends. Having had a rummage in the attic, I’ve just unearthed another blue 20, so once this is also upgraded and weathered, it’ll give me the option of a blue pair to suit the mid-late-80s period too: just the job for my colliery layout, especially once the extension has been built.
As pairs of 20s on MGR coal traffic was one of the highlights of my teen spotting years, I’ve long wanted to recreate them in miniature, especially the faded blue paint and filthy appearance. Although I just can’t get excited enough about DCC to move away from the old fashioned way of playing trains, there are times when the idea of sound-fitted locos appeals. But, no matter how good the sound is, I get fed up after a short while and want to switch it off. Besides, my imagination is pretty vivid, so I’m happy enough to watch the mini 20s trundle by with the sounds rekindled in my head being the best soundtrack...

Upgrading the roof fan grille is almost essential on many RTR diesels as we spend most of our time looking down onto the models. This is an early Shawplan etch, but I’ve since started fitting the same maker’s Extreme Etches version, although these are very delicate.

The original red plastic fans have been retained in all my models because, well... I’m just lazy!

One of the great features of the Bachmann 20 is the ease with which the cab can be lifted off to allow a driver to be fitted. This chap is obviously checking his schedule between shunting jobs...

Other upgrades include new brass buffers, drawhook, brake pipes, cab front handrails and finer headcode discs.

A pretty heavy coat of weathering has been applied, over some streaks of faded BR blue and yellow. Strips of masking tape on the windscreens create the areas of clean glass, mimicking the movement of the blades and ingrained filth behind the headcode discs and handrails is also pretty authentic.
 A speedo cable, fitted to one of the axleboxes, is a simple but effective detail to add. It’s just a small piece of plastic strip and brass wire.


Where did you get the brass etchings and pipes etc?
ReplyDeleteThe etched radiator grilles are from www.shawplan.com and the pipes are mostly those supplied with the Bachmann model. Some Craftsman Models jumper cables were added.
DeleteHi George, where did you get the buffers from?
Deletewill.
Hi, the turned brass buffers were from A1 Models, via MG Sharp, but they're no longer available, which is a great shame.
DeleteJust to let you know George, the buffers are available from peters spares.
DeleteThanks,
Will.
Thanks - I'll have a look!
DeleteGD.
Hi George, keep up the great work. I have your fantastic book Airbrushing for Rail Modellers. Where did you obtain the cab front handrails for the 20? Can't find these anywhere.
ReplyDeleteCheers, Gordon
Hi Gordon. Thanks - hope you find the book useful. The cab front handrails are formed from 0.33mm brass wire (from the Alan Gibson range), shaped with round-nose pliers to get that distinctive curve, using the plastic originals as a guide.
DeleteIndeed, part of Bachmann's plastic moulded handrails were retained to form the mounting bars. This is the bit of the moulding that fits into the cab front, so that was left in place while the rest of the handrail was cut away. The wire was then shaped and fitted, being fixed to the plastic stub with a drop of cyano glue.
Hope this makes sense. It's difficult to describe without an image.
Cheers,
George.