RAILROADED Part 2

There has been some frenetic action in my shed over the past few days - I played host to a lovely old gent from down the road for most of Saturday morning, who filled me in on life in these parts in the 1930s & 40s, as well as his hobby of building miniatures (houses and furniture). I could have chewed the cud with him all day.
But, after that, the decks were cleared and some more progress was made on replacing the shed's rotten external cladding. I've just got one side left to do, then the inside can get a full re-fit and, hopefully, some order can be achieved. For the past 5 years, I've managed to keep working, despite it being a tip. But a more professional-looking workspace may soon be within reach. Well, I did say maybe...
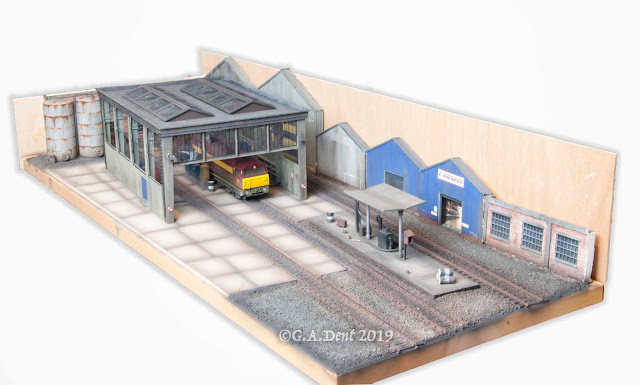
Just before the south-facing wall was demolished, I touched in the roof, cabs and yellow ends of my detailed Railroad Class 37. Compared to the last posting on this project, the bodyshell is already looking more refined. I masked the model only roughly whilst airbrushing the black roof fan and cab windscreens. Ditto for the yellow ends, with the modified areas primed in white first (airbrushed) and the Railmatch late BR yellow just misted over the local areas.
There's a little discrepancy in shades of yellow, but the airbrush allows this to be blended subtly, giving the effect of natural fading. the '414' repeater numbers have been partially obscured by the new paint, so some decals will have to be added, but I cleaned off the new paint on the OHW flashes with a cocktail stick and white spirit. The marker light lenses were covered with little blobs of Blu-Tack.
Once the orange jumper cable boxes and missing cantrail stripe have been touched in, the weathering process can begin.


Hi George, that jumper cable is from ViTrains, right? I ask because it seems to go from the blue star multiple working plug (right of the front) to the Electric train heating plug (middle). Both should be separate and terminate on the buffer beam, the MU to the left of the right hand buffer, and the ETH to a little box to the right of the right hand buffer, under the buffer beam. I guess though, when it's all painted you won't be able to tell, I'm just like getting the small details right, even in 4mm.
ReplyDeleteHi James, Yes, the cable is from the ViTrains pack of details and, yes, it should be fitted to the bufferbeam. The MU cable from the bufferbeam is also wrong as supplied by Vi-Trains. I've corrected a couple of my 37s, but find it a real hassle when trying to lift the bodyshell off for maintenance - With the loop fixed to the cab front only, it can be lifted over the buffers and, besides, once it's all put together, with the other pipes and hoses, the error is not so noticeable (to me anyway!).
ReplyDeleteAll the best,
George.