JPA DEMO DERAILED

I suppose it has to happen sometimes, but it's frustrating when mistakes creep into a publication, especially when a lot of hard work has been put into an article. The latest issue of Model Rail (MR166) features the PH Designs detail kit for the Bachmann JPA in a Workbench Test (pp48-50). However, the step-by-step instructions have somehow become corrupted. Below is the order in which they were submitted. And apologies for any confusion caused...
Regular readers may remember my Blog entry on the subject of this detail kit, back in September 2011. Click here to read it again. More info on the PH Designs kit can be found here.
 |
((Step 1))
The replacement JPA tank walkway kit consists of a single
sheet of 0.15mm etched brass. The original bulky moulding needs to be cut away
with a sharp knife and the wire rails pulled out and put to one side.
|
 |
((Step 2))
Razor sharp, heavy-duty scissors, or a set of shears designed
for use with etched metal, are essential to avoid damaging the delicate parts
whilst cutting them from the fret. Remove the waste as you go to give the jaws
room to work.
|
 |
((Step 3))
Study the supplied instructions and diagrams carefully before
folding the walkways to shape. A Hold ‘n’ Fold is heartily recommended, as it
will keep the brass flat whilst bending with a long, flat blade.
|
 |
((Step 4))
Use a small setsquare against the base of the Hold ‘n’ Fold
to gauge the angle of the fold. Make any adjustments with the blade along the
length of the component and recheck until a 90o angle is achieved.
|
 |
((Step 5))
Fold up the small handrail mounting brackets to a U shape and
fix to the walkways with cyanoacrylate glue. Use a straightedge and pencil to
mark their positions first, ensuring the brackets are in a straight line.
|
 |
((Step 6))
Dab a drop of slow-drying cyano glue or epoxy onto each of
the mounting feet and fix the walkways into place atop the tank. Re-fix the
original wire handrails into the new brackets and secure with cyano.
|
 |
((Step 7))
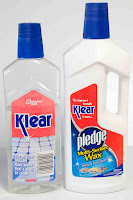
Careful masking will preserve the finish whilst painting the
new parts. Begin with a thin coat of Alclad2 grey primer, sprayed from an
airbrush. Leave the mask loose to produce a soft blend between the new and old
paint.
|
 |
((Step 8))
Alclad2’s Dull Aluminium is a perfect match for the Bachmann
finish and was also sprayed from an airbrush (this paint cannot be applied by
hand). Due to the loose mask, a virtually seamless ‘feathered’ edge is
achieved.
|


Comments
Post a Comment